Featured

Cardamom Shortbread

Shortbread is delicious. Shortbread with cardamom and a little chocolate is warm and heavenly!

½ cup butter, room temperature

1/3 cup sugar

1 cup white unbleached flour

¼ cup stone ground whole wheat flour

1 ½ teaspoons fresh ground cardamom (pre-ground is fine)

1 quality chocolate bar, 3 oz. (I prefer Theo’s 85% dark chocolate)

In a mixing bowl of an electric mixer whip the butter for about 1 minute. Add the sugar and beat until creamy.

Add the flours, and cardamom. Blend until the mixture crumbly. To get it all to combine, mix with your hands. Form it into a ball, seal it in a small container or plastic wrap, and refrigerate until firm. If it is already firm, then go ahead and roll it out.

Preheat oven to 350oF.

On a lightly floured surface, roll the dough ¼” thick. Cut in desired shapes. It is best to use cutters no larger than 2 to 3 inches across. Transfer the shapes to an ungreased or parchment lined cookie sheet. Bake for 12 to 15 minutes, or until the bottoms of the cookies are slightly brown.

When cookies are cool, melt the chocolate in a double boiler. Dip the bottoms or one edge of the cookies in the chocolate. Lay them on a wax paper lined tray. To set the chocolate, place the tray in the refrigerator for a few minutes.

Store in an air tight container. Do not freeze these once the chocolate is on them, as it will ruin the chocolate. The naked shortbread cookies can be stored in the freezer, and then dipped in chocolate when you are ready for them.

Recipe by Jane Blaisdell, 2020.

Featured

Sour Dough Bread

Delicious, fresh bread. There is great satisfaction in creating a beautiful loaf with your own nurtured starter. The aroma, flavor, and texture are amazing.

  • 1/4 cup sour dough starter
  • 1-1/2 cups warm water
  • 1/2 cup rolled oats (not cooked)
  • 1 cup Einkorn flour, or whole wheat flour
  • 1 cup white whole wheat flour, or whole wheat flour
  • 1 cup bread flour (unbleached)
  • 2 teaspoons salt

The day before baking day, in the morning, measure 2 tablespoons of your happy, healthy sour dough starter. Add this amount to ½ cup flour and ½ cup water. Stir well, and allow this to sit all day.

In the evening, when the super fed starter is bubbly, proceed to creating the bread dough.

Mix together all of the ingredients from the above list – except the salt.

Allow the dough to sit for at least one hour, to let the flour and oats hydrate. Then, fold in the salt.

Cover the mixing bowl with a plastic bag, or vinyl topper and let the dough sit overnight.

In the morning, the dough should be bubbly and at least doubled in size. Give the dough a bit of kneading on a lightly floured surface. Line a medium bowl with a towel and dust well with flour. Or, if you want to bake the bread in a loaf pan, oil the pan. Either way, set the dough in the bowl or loaf pan. Allow this to sit for at least one hour.

If you are baking a round (boule) loaf, set a cast iron dutch oven, with lid into the oven. Preheat the oven to 450oF. If using a loaf pan, preheat the oven to 400oF Allow the dutch oven time to heat, even after the oven has heated.

Remove the dutch oven from the oven, remove the lid, and tip the loaf carefully into the dutch oven. Replace the lid, slide it back in the oven and bake for 30 minutes.

If baking in the loaf pan, bake for 35 to 40 minutes.

When the bake time is up, check the interior temperature of the loaf. It needs to be at least 190oF. Return it to the oven for another 5 minutes if it isn’t done.

Allow the bread to cool before removing it from the pan

Enjoy.

Recipe by Jane Blaisdell, 2020. Inspired by Sandor Ellix Katz, Wild Fermentation, 2016.

Featured

Bean Burgers

These delicious, fairly simple to make burgers, make a wonderful earth friendly meal.

  • 3 tablespoons olive oil, divided
  • ½ cup minced onion
  • 1 clove garlic, minced
  • 1 ½ cup cooked beans (black, cranberry, pinto…) drained and rinsed
  • 1 tablespoon chopped fresh parsley
  • ½ cup rolled oats, quick or regular
  • ¼ cup whole wheat flour
  • 1 teaspoon paprika, or smoked paprika
  • ½ teaspoon dried thyme
  • Salt and pepper, to taste

In a sauté pan, heat 1 tablespoon of the oil over medium-low heat. Add the onions and allow them to slowly soften. When the onions appear cooked, add in the garlic and cook for an addition minute, stirring to prevent the garlic from burning.

Transfer the onion mixture to a medium bowl, and add the remaining ingredients. Mix well, and add salt and pepper to taste. If the beans you are using are firm, you may want to whirl the mixture briefly in a food processor. But be careful to not lose all of the bean texture.

Cover the bowl and refrigerate for at least 1 hour, to allow the oats and flour to hydrate.

Form the bean mix into 4 to 5 patties, depending on your size preference.

Heat a skillet on medium heat, and add the remaining 2 tablespoons oil. When the oil is hot, add the burger patties. Cook for about 5 minutes on each side, or until crispy and browned.

Serve with a bun and any burger condiments you prefer.

Notes: Play around with the ingredients. You may like to add some other vegetables (finely chopped) or mushrooms. But not too much, or the burgers won’t hold together.

I served my burger with sautéed mushrooms, cheese, lettuce, and a little secret sauce (mayo, ketchup, sriracha, and sweet pickle relish)

Recipe adapted by Jane Blaisdell, 2020. Original recipe by Robin Robertson, 1,000 Vegan Recipes, 2009.

Featured

Rhubarb Almond Coffee Cake

Spring is the time for rhubarb! I love its delicious tartness and beautiful red hue. This simple cake is quick to mix, and can be baked the day before you want to serve it.

  • 2 cups rhubarb, sliced thin
  • 1 cup sugar
  • 1 cup flour (white or whole wheat pastry or a gluten free blend)
  • ½ teaspoon baking soda
  • ½ teaspoon ground ginger
  • ¼ teaspoon ground nutmeg
  • 1 egg
  • ¼ cup butter, melted
  • ½ cup almonds, chopped or sliced

Preheat oven to 350oF.

Grease an 8” x 8” baking pan.

In a medium size bowl, mix together the rhubarb and sugar. Allow this to sit while gathering the other ingredients.

In a small bowl, mix together the flour, baking soda, ginger, and nutmeg.

Now add the egg, butter and almonds to the rhubarb. Blend this well.

Add the flour mixture to the rhubarb mix. Stir just until the dry ingredients are mixed in.

Spread the batter into the baking pan.

Bake for 35 to 40 minutes, until lightly browned.

Allow this to cool at least 10 minutes before serving.

Serves 8.

Recipe by Jane Blaisdell, 2020.

Featured

Savory Dutch Baby

This quick simple dish is a delicious and easy way to get some healthy greens into your diet.

  • 2 tablespoons olive oil
  • ½ cup flour
  • ½ cup milk
  • 3 eggs
  • ½ teaspoon salt
  • ½ teaspoon pepper
  • 1 bunch of greens (collards, spinach, kale…) – cleaned and roughly chopped – divided
  • 2 tablespoons chopped parsley – divided
  • 1 tablespoon butter
  • ½ cup shredded cheese – cheddar or other favorite
  • ½ cup dried tomatoes – soaked in hot water, then coarsely chopped
  • Mushrooms – any variety – about 1 cup – roughly chopped
  • Balsamic vinegar – to taste

Pour olive oil into a medium cast iron skillet (9 inch). Place the skillet in a cold oven and preheat to 425oF.

Whisk together the flour, milk, eggs, salt and pepper. Stir in ½ cup of the chopped greens, and 1 tablespoon of the chopped parsley. Set aside, while you get everything else chopped and the oven gets up to temperature.

Pour egg mixture into the hot skillet and set timer for 20 minutes.

After about 10 minutes, heat another skillet over medium heat. Melt the butter and add the remainder of the greens and parsley. Stir the greens until they become wilted.  Add a couple of tablespoons water, cover the pan, reduce heat to low, and allow the greens to braise for a few minutes.

When the timer rings, sprinkle the cheese on top of the dutch baby and return it to the oven for about 5 more minutes.

Remove the lid from the greens, add the tomatoes and mushrooms. Increase the heat to medium and allow the mushrooms and tomatoes to cook, stirring constantly. Splash about a tablespoon of balsamic vinegar on the greens, add some salt and taste. Check for salt and acid, and adjust as necessary.

Remove the dutch baby from the oven and distribute the greens mixture over the top.

Serve immediately!

Serves 4

Prep time – about 30 minutes

Recipe revised by Jane Blaisdell, 2020. Original recipe from Better Homes & Gardens, August 2018.

Featured

Granola

It’s so easy to create a batch of homemade granola, and you can customize it to your preferences; low or no sugar, no nuts, a lot of nuts and seeds, favorite spices…

  • 4 cups rolled oats (rolled wheat or barley can be substituted)
  • 1 1/2 teaspoon cinnamon (allspice, ginger, or even cardamom can be used)
  • 1 scant teaspoon salt
  • 5 to 6 tablespoons butter, melted
  • 1/3 cup honey – optional or can be reduced
  • 1 1/2 teaspoon vanilla extract
  • 1 to 1 1/2 cups of chopped nuts and seeds – almonds, walnuts, pecans, hazelnuts, pepitas, sunflower seeds.

Preheat oven to 325 degrees F.

In a large bowl, mix together the oats, cinnamon and salt.

In a small bowl, mix together the butter, honey and vanilla.

Mix the wet ingredients into the dry ingredients and spread them onto a large rimmed baking sheet. Bake for 10 minutes.

Remove from oven, stir the granola, and add almonds.

Return the granola to the oven and bake for 5 minutes. Remove from oven, stir and add the remainder of the seeds and nuts. Bake for 10 minutes.

Allow the granola to cool before placing in an air tight container. The granola will keep for several weeks.

Variations: Dried fruit can be added after the granola has cooled. Peanut butter (1/4 to 1/2 cup) can be added to the butter mixture, and shredded coconut can be added with the last nut addition.

Recipe by Jane Blaisdell, 2020.

Featured

Poached Apples

The perfect winter treat. These are simple to prepare, and delicious for breakfast or dessert.

Apple juice, 1 small can, 5.5 ounces (about ¾ cup)

1 tablespoon brown sugar

½ teaspoon cinnamon

2 – 3 apples, cored and sliced, about ¼ inch thick

Combine the apple juice, brown sugar and cinnamon in a medium size saucepan. Bring the mixture to a boil and add the apples. Stir gently, so the apples all have a turn in the hot liquid. When the apples appear to have heated through, (they should not be cooked enough that they lose their shape) remove them from the heat and scoop the apples out of the juice. Return the pan and the juice to the stove and reheat to boiling. Continue to boil until the juice is reduced (fairly thick). Pour the reduction over the apples.                                                                                                                                                                      Serve the apples warm, with yogurt, crème fraiche, or sweetened sour cream. These can be made ahead of time and reheated.

Serves 6 to 8                                                                                                                                                             

Prep time: about 15 minutes

Recipe by Jane Blaisdell, 2019

Featured

Sauerkraut with Garlic and Onion

Fresh, delicious, with just enough zip from the garlic and onion. It can be a tasty side dish for any meal.

  • 1 head; 2-pounds, green cabbage
  • 4 teaspoons kosher salt (1 teaspoon per half-pound of cabbage)
  • 1 medium white onion, or 4 small spring onions, sliced into thin half-moons
  • 4 cloves garlic, minced

Weigh head of cabbage.

Cut cabbage head in half, cutting it north to south, so you are cutting through the core. Cut in quarters, cutting the same direction, through the core. Cut the core away from each quarter. Discard the core.

Slice each section into 1/8 inch ribbons, and place them into a large bowl.

Add 1 teaspoon of salt per ½ pound of the whole cabbage weight. Sprinkle salt over the shredded cabbage.

Prepare the onions and garlic, but don’t add them to the cabbage, yet.

The pre-salting of the cabbage will give it a chance to begin releasing water.

With clean hands, begin massaging the cabbage. Grab it hard, and move it around to massage each shred. Massage for at least 3 minutes (set a timer). The cabbage should reduce by about half in volume.

Add the onion and garlic. Mix well.

Place the mixture in a fermentation vessel. Half gallon canning jars are great for this, as are ceramic crocks. One quart, wide mouth canning jars will do also, but you will need 2 of them.

Add some cabbage to the container and compress after each scoop. Use your fist to press the mix into the bottom of the vessel, making sure the vegetables are tightly compacted. There should be enough liquid from the cabbage to cover the vegetables.

Place a weight on top of the mix to keep it covered with liquid. When using a canning jar, you can fill a thin glass (or ½ pint jam jar) with water and set this on top of the mix.

Cover the vessel with a cloth to keep the dust and un-savories from getting inside. Set the vessel in a dish to catch any liquid over-flow when the fermentation begins.

Leave the vessel on the counter. Visit if often the first day to make sure the weight is keeping the mixture submerged. After 3 days, taste it! It will probably need several more days to achieve proper sourness.

Once you are happy with the flavor, move the new sauerkraut to the refrigerator in a covered container. If you used a canning jar, just add a lid.

It will continue to ferment, but at a much slower pace.

Preparation time: 15 minutes

Fermentation time: 3 days minimum

Yield: 1 ½ quarts

Note: the Sauerkraut may turn soft if your house temperature rises above 75oF during the fermentation.

Recipe revised by Jane Blaisdell, 2019. Original recipe by Cynthia Lair, 2014.

Featured

Salmon Cakes

When life gives you excess salmon, make Salmon Cakes! It’s probably just a Pacific Northwest problem, but sometimes we cook too much salmon when friends come for dinner. This is one delicious option for the leftovers.

  • 2 to 3 cups cooked salmon, flaked, bones removed
  • 2 – 3 green onions, thinly sliced
  • ¼ cup dry bread crumbs
  • 3 tablespoons mayonnaise
  • 1 egg, beaten
  • 2 teaspoons prepared mustard
  • ½ teaspoon salt
  • Dash of pepper
  • 2 tablespoons butter
  • 2 tablespoons oil, I prefer avocado oil

In a medium bowl, combine the first 8 ingredients. Mix well.

Shape into small patties, about 2 inches wide and ½ inch thick.

Refrigerate for at least 30 minutes.

Place a large skillet over medium heat. Add the butter and oil, giving it time to get hot.

Place the cakes in the hot oil and cook for 6 to 8 minutes on each side, until they are brown and crispy on the outside, and hot on the inside. Serve immediately!

These can be served with tartar sauce.

Optional, 2 to 3 tablespoons of chopped fresh herbs can be added to the mix: parsley or dill would be tasty.

Idea: make them burger size, and serve on a bun.

Makes about 8 cakes – 4 servings.

Prep time: 30 minutes

Recipe by Jane Blaisdell, 2019.

Featured

Blueberry Tart

Cinnamon spiced berries in a lemony pastry, topped with sweetened sour cream. Need I say more?

Pastry

  • 6 tablespoons butter
  • 3 tablespoons sugar
  • 1 small egg, lightly beaten (about 2 tablespoons)
  • ½ teaspoon vanilla extract
  • ½ cup whole wheat pastry flour
  • ½ cup, plus 2 tablespoons white flour
  • ¼ teaspoon salt
  • 1 to 2 teaspoons finely grated fresh lemon zest

Beat the butter and sugar together, until pale and fluffy. Beat the egg into the mixture. Add vanilla and beat it well. Add the flour, salt and zest, and mix in at a low speed, just until the mixture forms a dough.

Form the dough into a 5 to 6 inch disc. Seal the dough into an airtight container, and chill for at least 30 minutes.

Roll the dough out between two pieces of wax paper, until it is large enough to fit your baking pan (I used an 11 inch tart pan). Remove the top sheet of paper, and carefully fit the dough into the baking pan. Remove the other piece of paper, and work the dough into the corners of the pan. Trim the excess dough level with the pan. Prick the bottom of the pastry with a fork to keep it from puffing, and bake for about 15 minutes, at 375oF, or until lightly brown. Allow it to cool.

Filling

  • 4 cups fresh blueberries, divided
  • ¾ cups sugar
  • 2 tablespoons arrowroot starch
  • 2 tablespoons water
  • 2 tablespoons lemon juice
  • ½ teaspoon ground cinnamon

Fill the baked tart shell with 2 cups of berries.

In a medium sauce pan, mix together the sugar and starch. Add the water, lemon juice, cinnamon, and remaining 2 cups of berries.

Cook over medium heat, stirring constantly, until the mixture bubbles and thickens. Spread the cooked berries over the fresh berries, and chill the tart for at least 1 hour.

Topping

  • 16 ounces sour cream
  • 3 tablespoons sugar

Mix together the sour cream and sugar. Carefully spread the mixture over the cooled tart. Bake for 10 to 15 minutes, at 350oF, or until slightly set.

Cool and serve. This can be garnished with additional berries.

Recipe by Jane Blaisdell, 2019.

Featured

Real Peppermint Ice Cream

Fresh peppermint can transform this simple ice cream recipe to amazing!

  • 2 cups whole milk
  • 1 cup loosely packed fresh Peppermint leaves
  • 2/3 cup sugar
  • 1 tablespoon cornstarch or arrowroot starch
  • 1/3 teaspoon salt
  • 2 eggs
  • 1 cup half-and half

Heat the milk in a saucepan until almost simmering (about 200 degrees F). Remove from the heat, add the mint leaves, cover and let steep for 2 hours.

In a medium saucepan, combine the sugar, starch, and salt. Stir until well combined.

Strain the milk to remove the mint leaves.

Whisk in the mint steeped milk and eggs until well blended.

Cook over low heat, stirring constantly, until the mixture thickens and coats the back of a spoon (nappé).

Cover the pan, or transfer to another covered dish and refrigerate until cooled (about 2 hours).

When cooled, mix in the half-and-half, and transfer to an ice-cream freezer. Process until thick.

Transfer the ice cream to a freezer safe container and let it harden in the freezer for at least 2 hours.

Note: this recipe is the perfect quantity for the frozen canister style of ice cream freezers. There are hand crank and electric varieties.

Recipe adapted by Jane Blaisdell. Original recipe from The Good Housekeeping Cookbook, 1973.

Featured

Whole Grain Sourdough English Muffins

English muffins, fresh from your griddle! These are a simple bread, with a slight sourdough tang. Keep them in the refrigerator for up to a week, or freeze them for several months.

  • 1 tablespoon dry yeast
  • 1/2 cup warm water or whey (if you have been making cheese)
  • 1/2 cup plain yogurt
  • 1 tablespoon honey
  • 1 cup sourdough starter
  • 2 cups whole wheat flour
  • 1 teaspoon salt
  • 1/2 cup unbleached bread flour
  • cornmeal or extra flour
  • butter or oil

Place the yeast and the water (whey) into a large bowl. Stir to dissolve.

In a small pan, mix together the yogurt and honey. Warm them over low heat, just until lukewarm. Add this to the yeast mixture, along with the sourdough starter. Add the whole wheat flour and mix well. Allow this to sit for 20 to 30 minutes, to allow the whole grains to hydrate.

Add the salt and the bread flour, mix well. More flour can be added if it feels too sticky. Plop the dough onto a well floured surface and knead it until it is smooth.

Place the dough into an oiled bowl, and let it rise in a warm place for about 1 hour. It should double in size.

Punch down the dough and divide it into muffin sizes. I use a kitchen scale and make each muffin about 2.5 ounces. Or you can divide it into 9 to 12 somewhat equal muffins. Form each piece into a ball and flatten against a surface coated with cornmeal or flour. The pieces should be about 1/2 inch thick and well covered with meal or flour. Set the muffins on a tray and cover with a cloth. Let rise for about 45 minutes.

Heat a griddle to about 250 degrees F. Grease the griddle with butter. Bake each muffin round on the griddle for 10 minutes on each side.

Cool on a rack. Split and toast to enjoy their homemade goodness.

Prep time: about 3 hours

Makes: 9 – 12 muffins

Recipe adapted by Jane Blaisdell, 2019. Original recipe by Cynthia Lair, 2012.

Featured

Paneer

This is a simple cheese to make, and is used in many Indian dishes. Be creative, and find other uses for it; toss it into salads, add it to a cracker appetizer, or use it where you might use tofu. The recipe can be easily cut in half, if you don’t want to make as much cheese.

  • 1 gallon whole milk, cow’s milk or goat’s milk (not ultra-pasteurized)
  • ½ cup lemon or lime juice, or white vinegar – additional juice may be required, depending on the acid level of the fruit.
  • 1 teaspoon salt

In a large pot, over medium heat, directly heat the milk to 200oF, or nearly boiling. Stir often to prevent scorching. Reduce heat to low and stir in lemon or lime juice, or vinegar, cooking for 10 to 15 seconds. The curds should form quickly.

Remove curds from the heat and add the salt. Let it set for about 20 minutes.

* If the whey is still milky (instead of clear), return the milk to the heat and add a few more teaspoons of juice/vinegar while gently increasing the heat. Once you obtain a clear separation of curds and whey, remove from the heat and allow it to rest.

When the curds have settled below the whey, gently ladle the curds into a cheesecloth-lined colander. Set the colander in another pot or bowl if you wish to reserve the whey. Gently twist the top of the cheesecloth to squeeze out additional whey.

The bag of curds can be hung to drain for 2 to 3 hours or you can return the curd mass to the colander and place a weight (bowl of water, or brick) on top; press until the curd is firm.

Store the cheese in the refrigerator for up to 2 weeks.

*Do not use an aluminum pan – it will leach into the cheese causing a bad taste.

Yield: 1 ¾ to 2 pounds

Total prep time, from start to draining in cheesecloth: about 1 hour. Additional time needed for draining.

Uses for whey: cooking liquid for hot cereal, or vegetables, Use in place of part of the stock in a soup, water your plants with it, use it for the liquid when making bread.

Recipe adapted by Jane Blaisdell. Original recipes by Jackie Freeman, PCC Cooks Workshops, 2016 and opalcab, Tasty Kitchen.

cheesemaking2Paneer-1000

Featured

Kadai Paneer

This delicious recipe is made with paneer cheese, cooked in a slightly spicy sauce made of onions, tomatoes, peppers and traditional Indian spices. It is a popular Indian curry and cooked throughout the world.

  • 1 tablespoon whole coriander  seeds
  • 1 dried red chili pepper – add more for a spicier sauce
  • ½ teaspoon whole, dried Fenugreek
  • ½ teaspoon turmeric powder
  • ½ teaspoon Garam Masala
  • 2 tablespoons Ghee, butter, or oil (or more, if needed)
  • 1 large onion, chopped
  • ~1 inch fresh ginger, finely minced
  • 4 cloves of garlic, finely minced
  • 1 Pablano pepper, diced
  • 4-5 large tomatoes, pureed, or 1 pint canned tomatoes (or tomato sauce)
  • 1 green bell pepper, thinly sliced
  • salt, to taste
  • ¼ cup cream or milk substitute
  • Paneer cheese, ½ pound, cubed
  • ½ cup chopped cilantro

Grind the coriander, red chili pepper, and fenugreek in a spice grinder or mortar & pestle. Add the turmeric and Garam Masala to the spices.

Heat the ghee, butter or oil in a large fry pan, over medium heat. Add onions to the pan, and gently cook them for 4-5 minutes, or until they become soft.

Add ginger, garlic and green chilies to the pan and cook for a minute.

Add pureed tomatoes to the pan. Cook the mixture for 5-6 minutes, allowing the sauce to thicken slightly.

Add the green bell pepper to the sauce and cook for 2-3 minutes.

Add salt, according to taste, and then add the cream to the sauce.

Toss in the Paneer Cubes, and cook for 2-3 minutes, allowing the cheese to heat through.

Garnish with the cilantro, and serve with Roti, Naan, or rice

Serves: 4

Prep time: 45 minutes

Recipe modified by Jane Blaisdell. Original recipe from vegecravings.com

P1000645

Featured

Whole Grain Bread

0209191615It’s snowy today in the Seattle area, where I live, and the perfect weather to do some baking. This is a basic dough that you can play around with and make your own variations. Different flours can be used, and nuts and seeds can be added. You can also use it for cinnamon rolls, or even roll some berries into it.

  • 1 package, or 1 tablespoon, active dry yeast
  • 1 teaspoon sugar or honey
  • 1 ½ cups warm water or warm milk (about 110° F)
  • 1 ½ cups whole wheat flour
  • 1 ½ cups unbleached bread flour
  • 1 teaspoon salt
  • oil

In a large mixing bowl, mix together the yeast, sugar, and warm water. Allow it to sit and bubble a bit, to make sure the yeast is active.

Mix in the whole wheat flour and let it sit for about 30 minutes. This allows the whole grain to absorb some of the water.

Mix in the bread flour and the salt. If you have a mixer with a dough hook, it makes this part easier. if not, get a sturdy spoon and mix until the flour is completely mixed in.

Transfer the dough to a lightly floured surface and knead for a couple of minutes. When the dough feels smooth and springy, you are done kneading.

Lightly oil a large bowl. Set the dough into the bowl, and then flip it over, coating the dough with the oil. Cover with plastic or a damp cloth and wrap in a towel, or set in a warm place. Allow the dough to rise for about 1 hour.

Oil a 9″ x 5″ bread loaf pan. Punch the dough down and form into a loaf shape. The easiest way is to flatten the dough, and then roll it up tight. Place it in the loaf pan, seam side down. Cover again with the plastic or damp cloth, and let it rise for about 1 hour.

Preheat the oven to 375° F.

Bake the loaf for 30 to 35 minutes. It will be golden brown when it it done. I stick a thermometer into the side of the loaf. When it reaches an internal temperature of 190° F, it’s done.

Allow your loaf to cool a bit before you slice into it.

Enjoy!

Notes:

  • A cheap shower cap is a great plastic cover for the dough bowl (don’t throw it away after one use – give it a quick wash with soap and water and hang to dry)
  • other optional flours: white whole wheat flour, einkorn flour, rye (no more than 1/2 cup), cornmeal (no more than 1/4 cup)
  • nuts and seeds: (no more than 1/4 cup total) sunflower, pepitas, chia, flax, chopped walnuts or pecans – add these in when you add the bread flour
  • You can use all-purpose white flour instead of bread flour, but it won’t have the same quality.

Recipe by Jane Blaisdell


Featured

Pickled Melon and Rhubarb with Mixed Greens

I created this recipe for my Son’s Pre-Wedding party, in August. It is a perfect summer salad and can easily be doubled, or more, to serve a crowd. The salad combines the tartness of rhubarb and the spice of pickled melons to create a delightful dish.

Dressing:

  • 2 tablespoons olive oil
  • 1 tablespoon brine from the pickled melon or rhubarb
  • 1 teaspoon poppy seeds
  • Pinch of salt

Salad:

  • 4 – 6 cups mixed greens: spinach, arugula, beet greens, baby kale… (any or all)
  • 2 tablespoons fresh mint, chopped or chiffonade
  • ½ cup pickled melon*, sliced thin
  • ½ cup pickled rhubarb (recipe below), sliced thin
  • 2 teaspoons toasted sesame seeds

For the dressing, combine the dressing ingredients in a small jar, and shake well to combine.  This can be made in advance and refrigerated until needed.

For the salad, wash the spin dry the greens. Place the greens in a medium sized bowl, and add the mint. Toss to mix.

Add half of the rhubarb and half of the melon and the dressing. Toss these together.

Sprinkle the salad with the remaining pickled fruit and the sesame seeds.

Serve immediately.


Prep time: 20 minutes

Serves 4 to 6

Recipe by Jane Blaisdell, 2018


*Recipe for Sweet, Sour, and Spicy Pickled Melon found at www.finecooking.com, by Domenica Marchetti.


Quick Pickled Spiced Rhubarb

  • ½ pound rhubarb stalks
  • ½ cup apple cider vinegar (or red wine vinegar)
  • ½ cup water
  • ½ cup sugar
  • ¼ teaspoon salt
  • 1 teaspoon yellow mustard seeds
  • ¼ teaspoon black peppercorns
  • ¼ teaspoon whole cloves
  • 1 whole arbol chile
  • 1 star anise

Have ready a hot, sterilized wide mount pint sized jar and a lid and ring

Wash and trim the rhubarb stalks, cutting them to size to fit the height of the jar, slicing any stalks lengthwise if they are too wide.

In a small pan combine the vinegar, water, sugar and salt and bring the brine to a boil.

Place the mustard seeds, peppercorns, cloves, arbol chile and star anise in the sterilized jar. Pack the rhubarb pieces tightly into the jars above the spices.

When the brine has boiled and the sugar and salt are dissolved, pour the liquid into the prepared jar, over the rhubarb. Place the lid and ring on the jar, and refrigerate for at least 48 hours, to cure.

Use within one month. The brine can be used for vinaigrettes or beverages.


Prep time: 15 minutes, plus 48 hours to pickle

Makes one pint jar

Adapted by Patrice Savery from Serious Eats at http://www.seriouseats.com/recipes/2012/04/pickled-rhubarb-stalk-recipe.html, author Marisa McClellan, April 2012.

0803181850.jpg

Featured

Blackberry Lavender Scones

In late summer when blackberries are ripe, these scones are a delicious morning tea or breakfast treat. If you save some berries in the freezer, they can be enjoyed any time.

  • 2 cups whole wheat pastry flour
  • 2½ teaspoon baking powder
  • 1 scant teaspoon salt
  • 2 tablespoons sugar
  • 1 teaspoon dried lavender flowers
  • Optional additional flavors (choose no more than one): zest of one lemon, ½ teaspoon ground allspice, ½ teaspoon cinnamon
  • ¼ cup cold butter, cut into small cubes
  • 1 cup blackberries (preferably frozen)
  • 1 egg
  • ½ cup milk

In a large bowl, mix together the flour, baking powder, salt, sugar and lavender, any other chosen flavors.

Add the butter and cut it into the flour mixture with a pastry blender, until it resembles large crumbs.

Add the blackberries and gently toss the mixture together.

In a small bowl, whisk together the egg and milk.

Add the milk mixture to the flour mixture and gently fold the ingredients together. Be careful to not break up the blackberries (This is where it helps to have frozen berries).

Form the dough into a ball, and then flatten into a disk, six to eight inches in diameter.

Wrap the dough disk in plastic, and refrigerate for at least 20 minutes.

Heat the oven to 450oF.

Set the scone disk on a parchment lined baking sheet, and cut as a pie into 8 pieces.

Bake for 10 to 12 minutes, or until lightly browned, and cooked through.

Enjoy!


Recipe by Jane Blaisdell, 2018.

P1000580

Featured

Apricot Walnut Scones

Fresh summer apricots are available for such a short time. You can capture their sweet tartness in these breakfast scones.

  • 2 cups whole wheat pastry flour
  • 2 ½ teaspoons baking powder
  • 1 teaspoon salt
  • ¼ cup butter, cold, cut into pieces
  • 1 cup fresh apricots, cut into ½ inch pieces
  • ¼ cup walnuts, coarsely chopped
  • 1 egg, slightly beaten
  • ½ cup milk

Preheat oven to 450o F.

Mix together the flour, baking powder and salt.

Cut in the butter with a pastry blender until the butter pieces are no larger than a pea.

Gently mix in the apricots and walnuts.

Mix together the egg and milk, then add to the flour mixture. Gently fold everything together just until mixed.

Form the dough into a disc, about ten to twelve inches across. Cut this as a pie, into eight pieces, and set on an ungreased baking sheet.

Bake for about 12 minutes, until golden brown.


Recipe by Jane Blaisdell, 2018.

P1000577

Featured

Spring Kale Salad

So easy, delicious and beautiful! These ingredients are at their peak in the spring, and were meant to be made into a wonderful salad. Feta or blue cheese could be added to make it even better.

  • 1 bunch of Kale, well rinsed and dried
  • ½ teaspoon salt
  • 2 tablespoons Balsamic vinegar
  • 3 tablespoons olive oil
  • 2 scallions, sliced, the white and green parts
  • ¼ cup coarsely chopped walnuts, toasted
  • 1 kiwi, peeled, quartered and sliced
  • ½ mango (medium – large) or 1 small mango, cut into small pieces
  • Fresh basil, 6 – 8 large leaves, thinly sliced

Roughly chop the kale and place it in a large bowl.

Sprinkle the salt over the kale and massage the kale until it is a darker green.

Mix in the balsamic vinegar, olive oil, scallions, and walnuts.

Add the kiwi, mango and basil and lightly toss.

Add more salt if needed.


Prep time: 20 minutes

Yield: 4 servings

Original recipe by Jane Blaisdell, 2018


Spring Kale Salad

Featured

Whole Grain Bagels

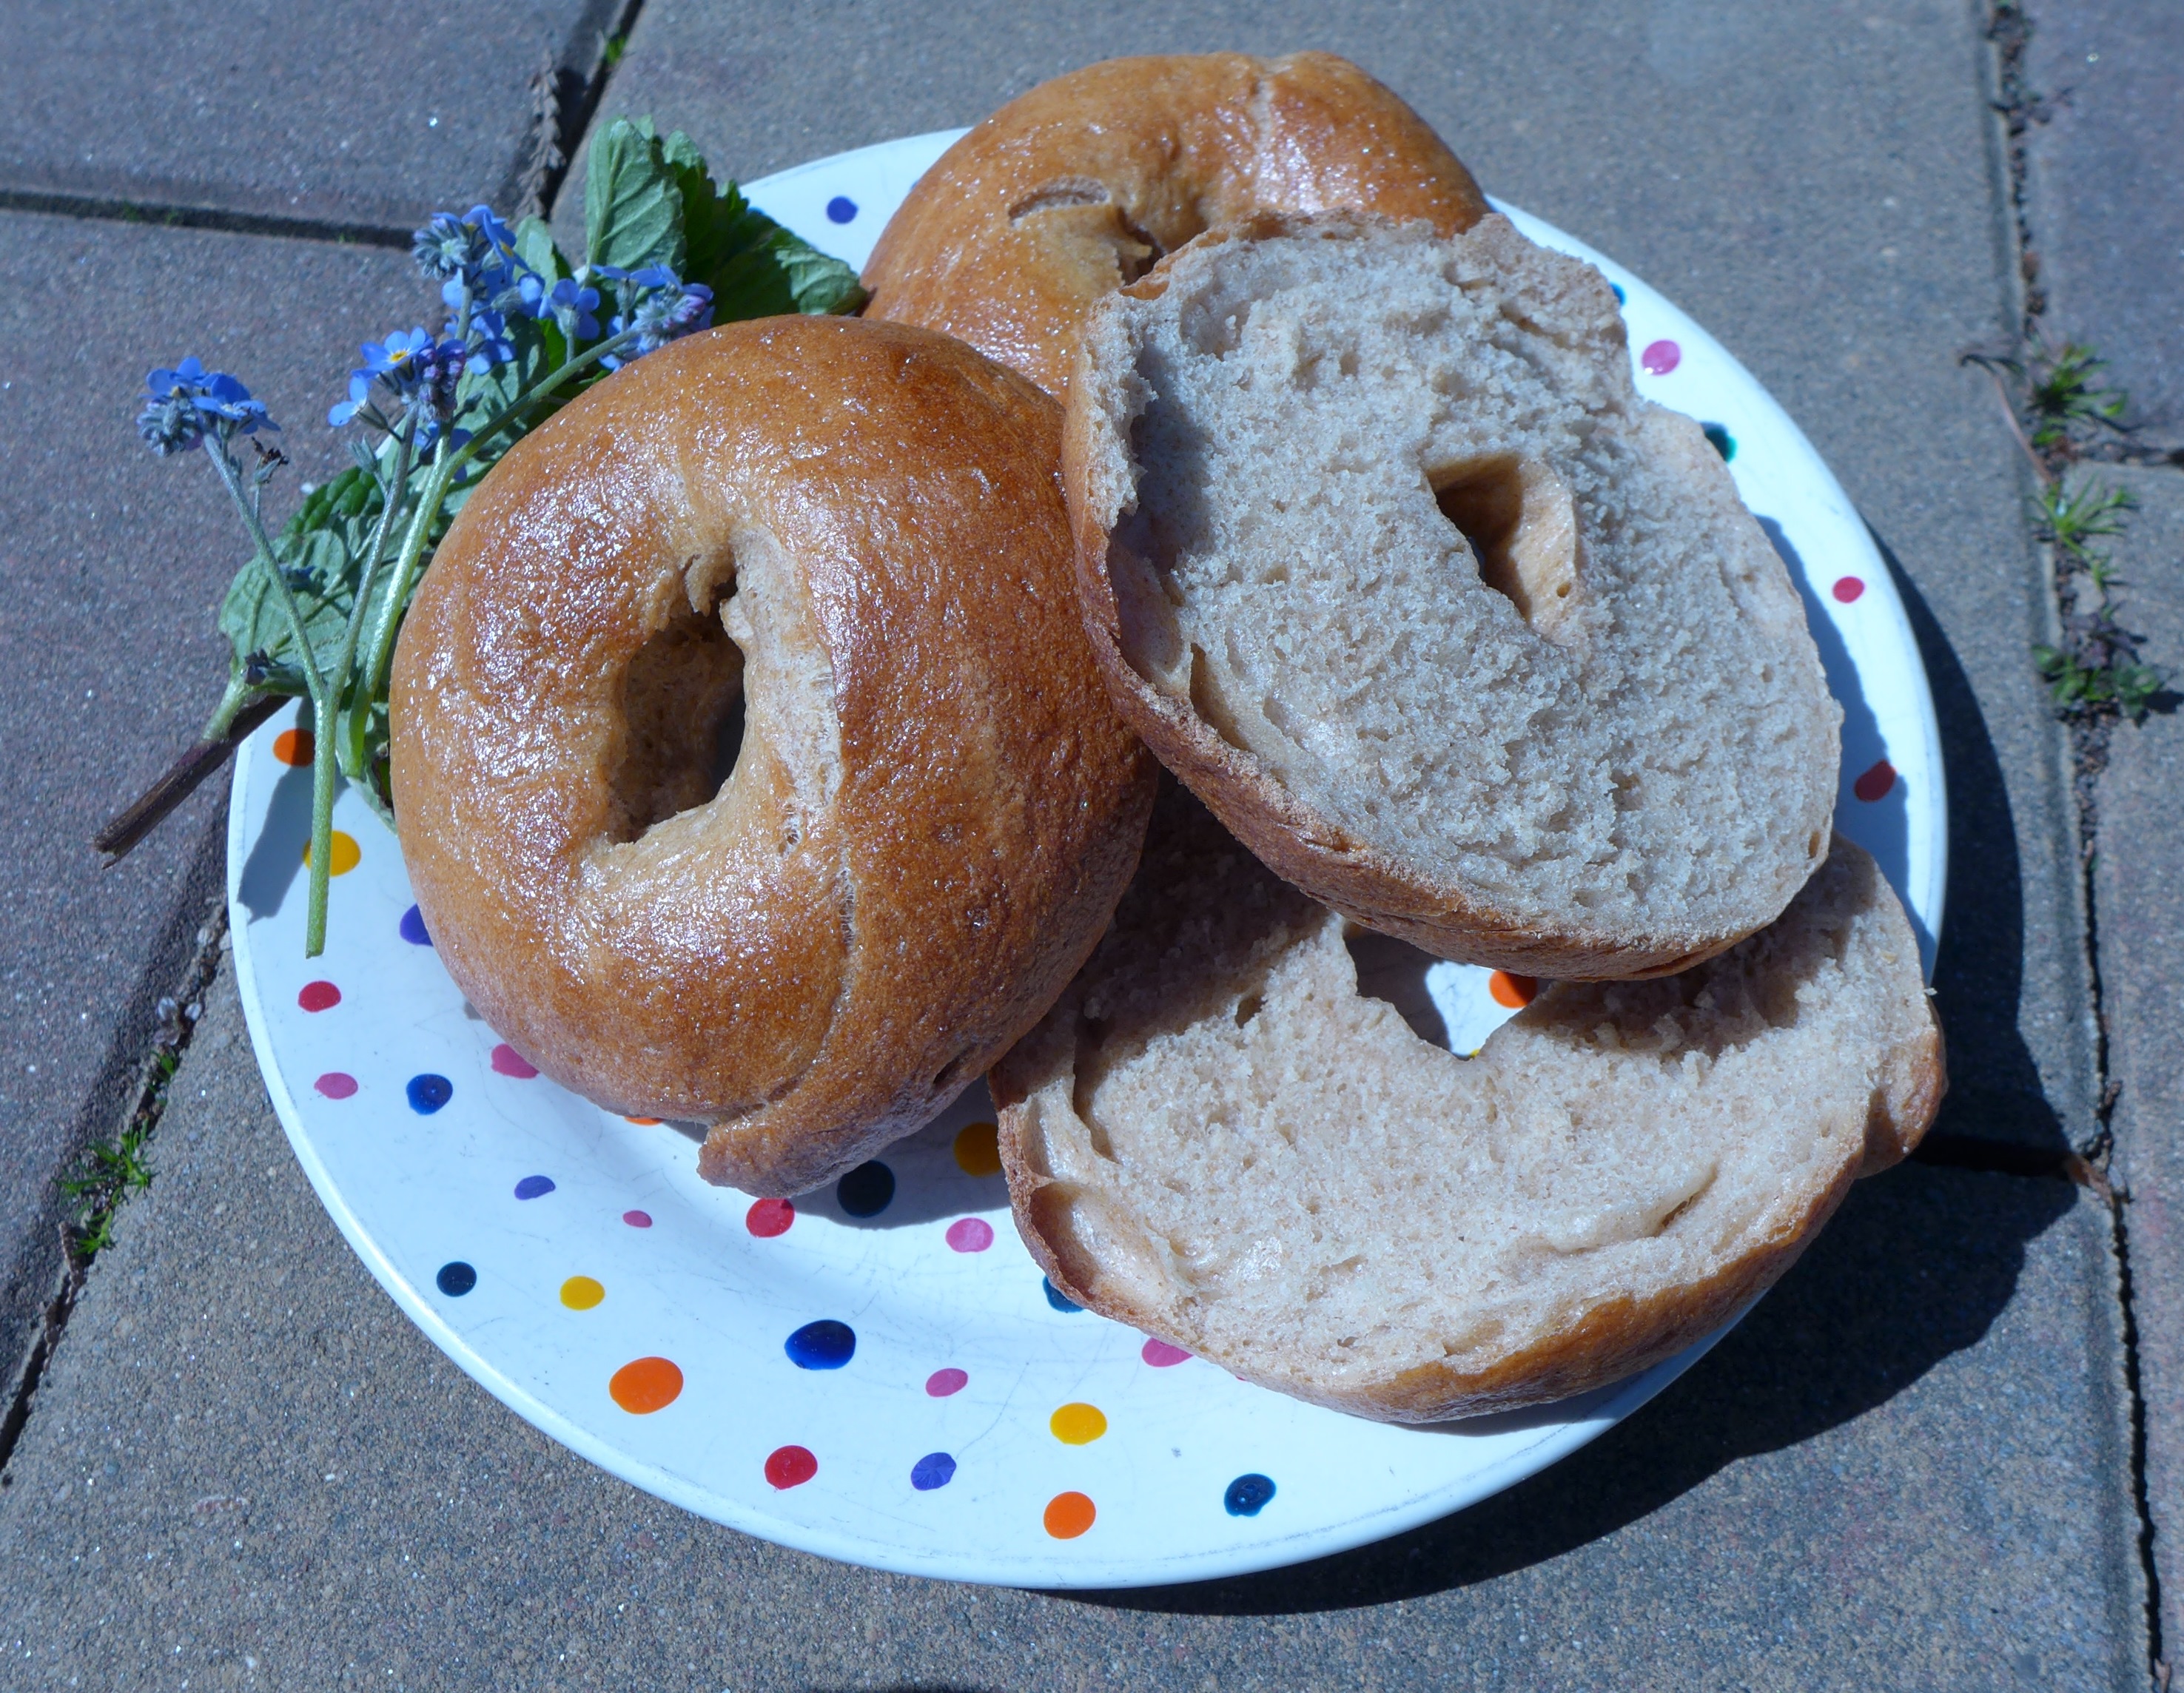
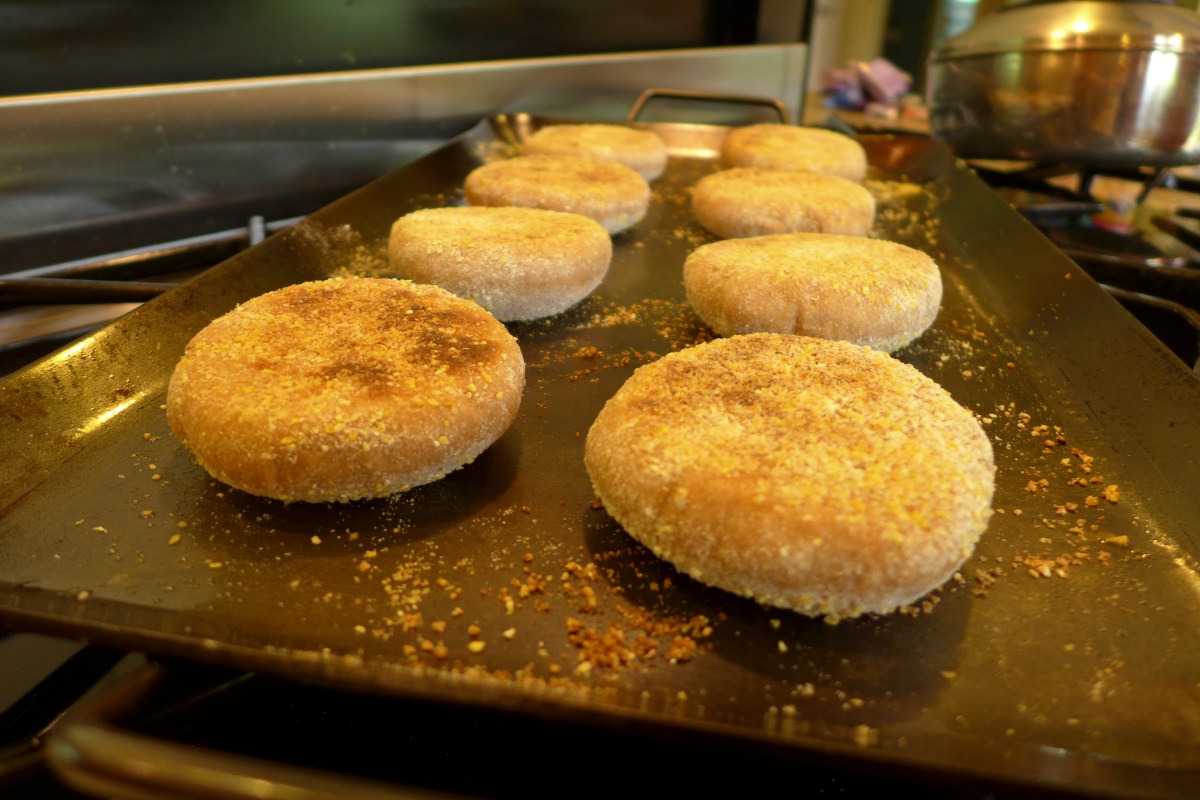
No more store bought bagels for me. These are full of flavor and wonderfully chewy, as bagels are meant to be.

Makes 12 to 18 bagels, depending on size

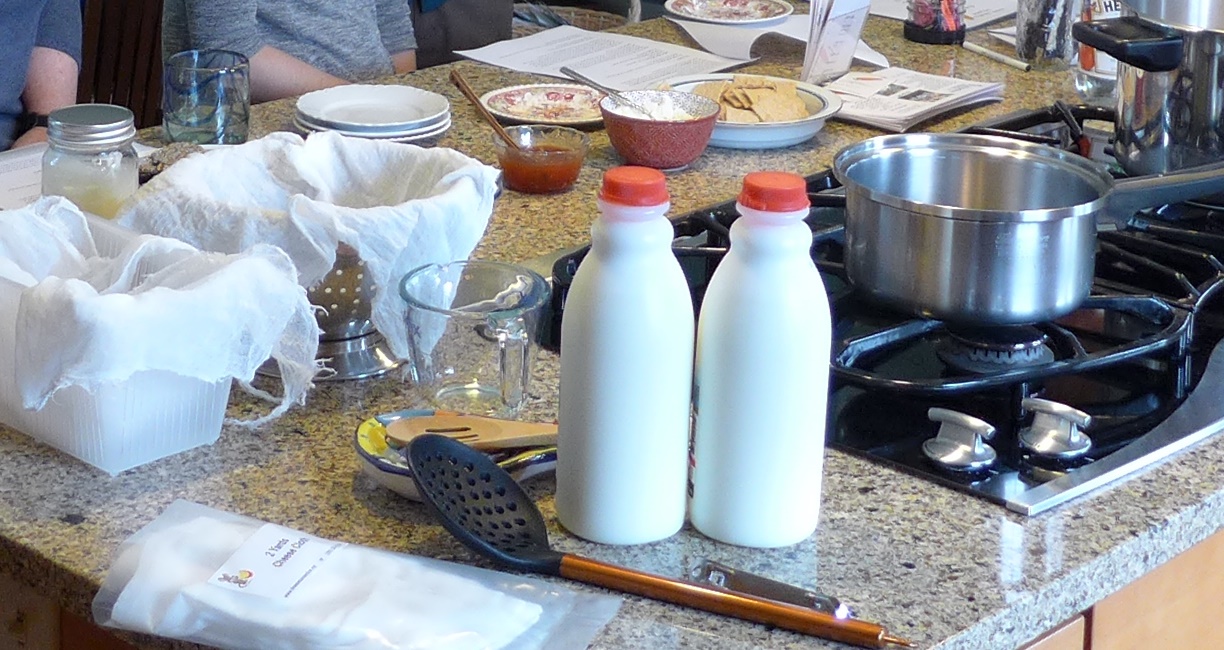
You need a stand mixer with a dough hook attachment

Total prep and cook time: about 2 hours

  • 3 cups organic hard red wheat flour (Bluebird Grains is my choice)
  • 2 tablespoons malt syrup
  • 2 teaspoons salt
  • 1 tablespoon honey
  • 1 packet active dry yeast (about 2 ½ teaspoons)
  • 1 ½ cup warm water (105o to 110o F)
  • 2 or more cups unbleached white bread flour
  • 1 egg
  • Optional toppings: poppy seeds, sesame seeds, coarse salt, dried garlic flakes

Combine the wheat flour, malt syrup, salt, honey, yeast, and warm water in the bowl of a stand mixer. Allow this to sit for 15 to 20 minutes, or until bubbles form.

Add 1 cup of the white bread flour, attach the dough hook and mix on low speed. Add ½ cup of flour at a time, until the dough is somewhat stiff. Increase the mixer speed to medium and continue mixing until the dough is smooth and elastic, 8 to 9 minutes more.

Place the dough in a large, lightly oiled bowl. Turn the dough to coat with the oil, and cover it with a damp towel. Allow the dough to rise for 20 to 30 minutes in a warm place. (I like to set the bowl in the oven, turn the oven on for just one minute, and then turn it off.  –I set a timer so I don’t forget to turn it off)  This dough will not double in size.

Preheat the oven to 425o F (or 400o F for a convection oven)

Fill a large pot with water and bring to a boil. Reduce the heat to medium and simmer.

Lightly oil a tray or baking sheet.

Place a metal rack over a second baking sheet.

Turn the puffy dough onto a dry work surface. Divide the dough into equal sized pieces. Standard bagels are about 3 ounces. For smaller bagels I like to cut them into 2 or 2 ½ ounce pieces. Keep the damp towel over the dough you are not working with, to keep it from drying out.

Roll each dough piece into a rope, about the thickness of a roll of nickels. Lightly moisten the ends with water, overlap the ends about one inch and press to join so you’ve created a bagel. As necessary, widen the hole in the middle so it is approximately the size of a quarter, and lay them on the oiled tray. Cover the shaped bagels with the damp cloth and let them rest for 10 minutes.

In the simmering water, boil the bagels 3 or 4 at a time for about 30 seconds on each side. Remove them to the rack sitting over the baking sheet, to allow them to drip dry.

Move the boiled bagels to an oiled or parchment lined baking sheet, about one inch apart. Whisk the egg with 1 tablespoon water and brush each bagel with the mixture. If you want toppings on the bagels, sprinkle them on now.

Bake for 20 to 25 minutes, until the bagels are a deep caramel color.

Let them cool for at least 30 minutes so the interiors finish cooking and the crusts form a chewy exterior.

When cooled, store them in an air tight container. Eat them within a couple of days, or store in the freezer for several months.


Recipe modified by Jane Blaisdell. Original recipe from PCC Cooks.
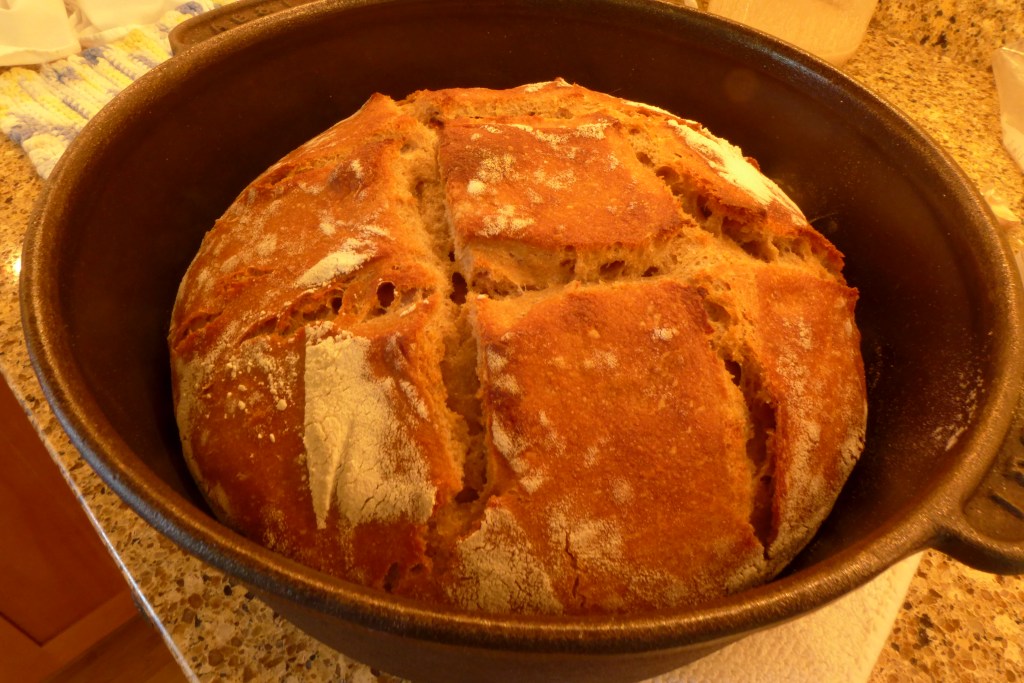
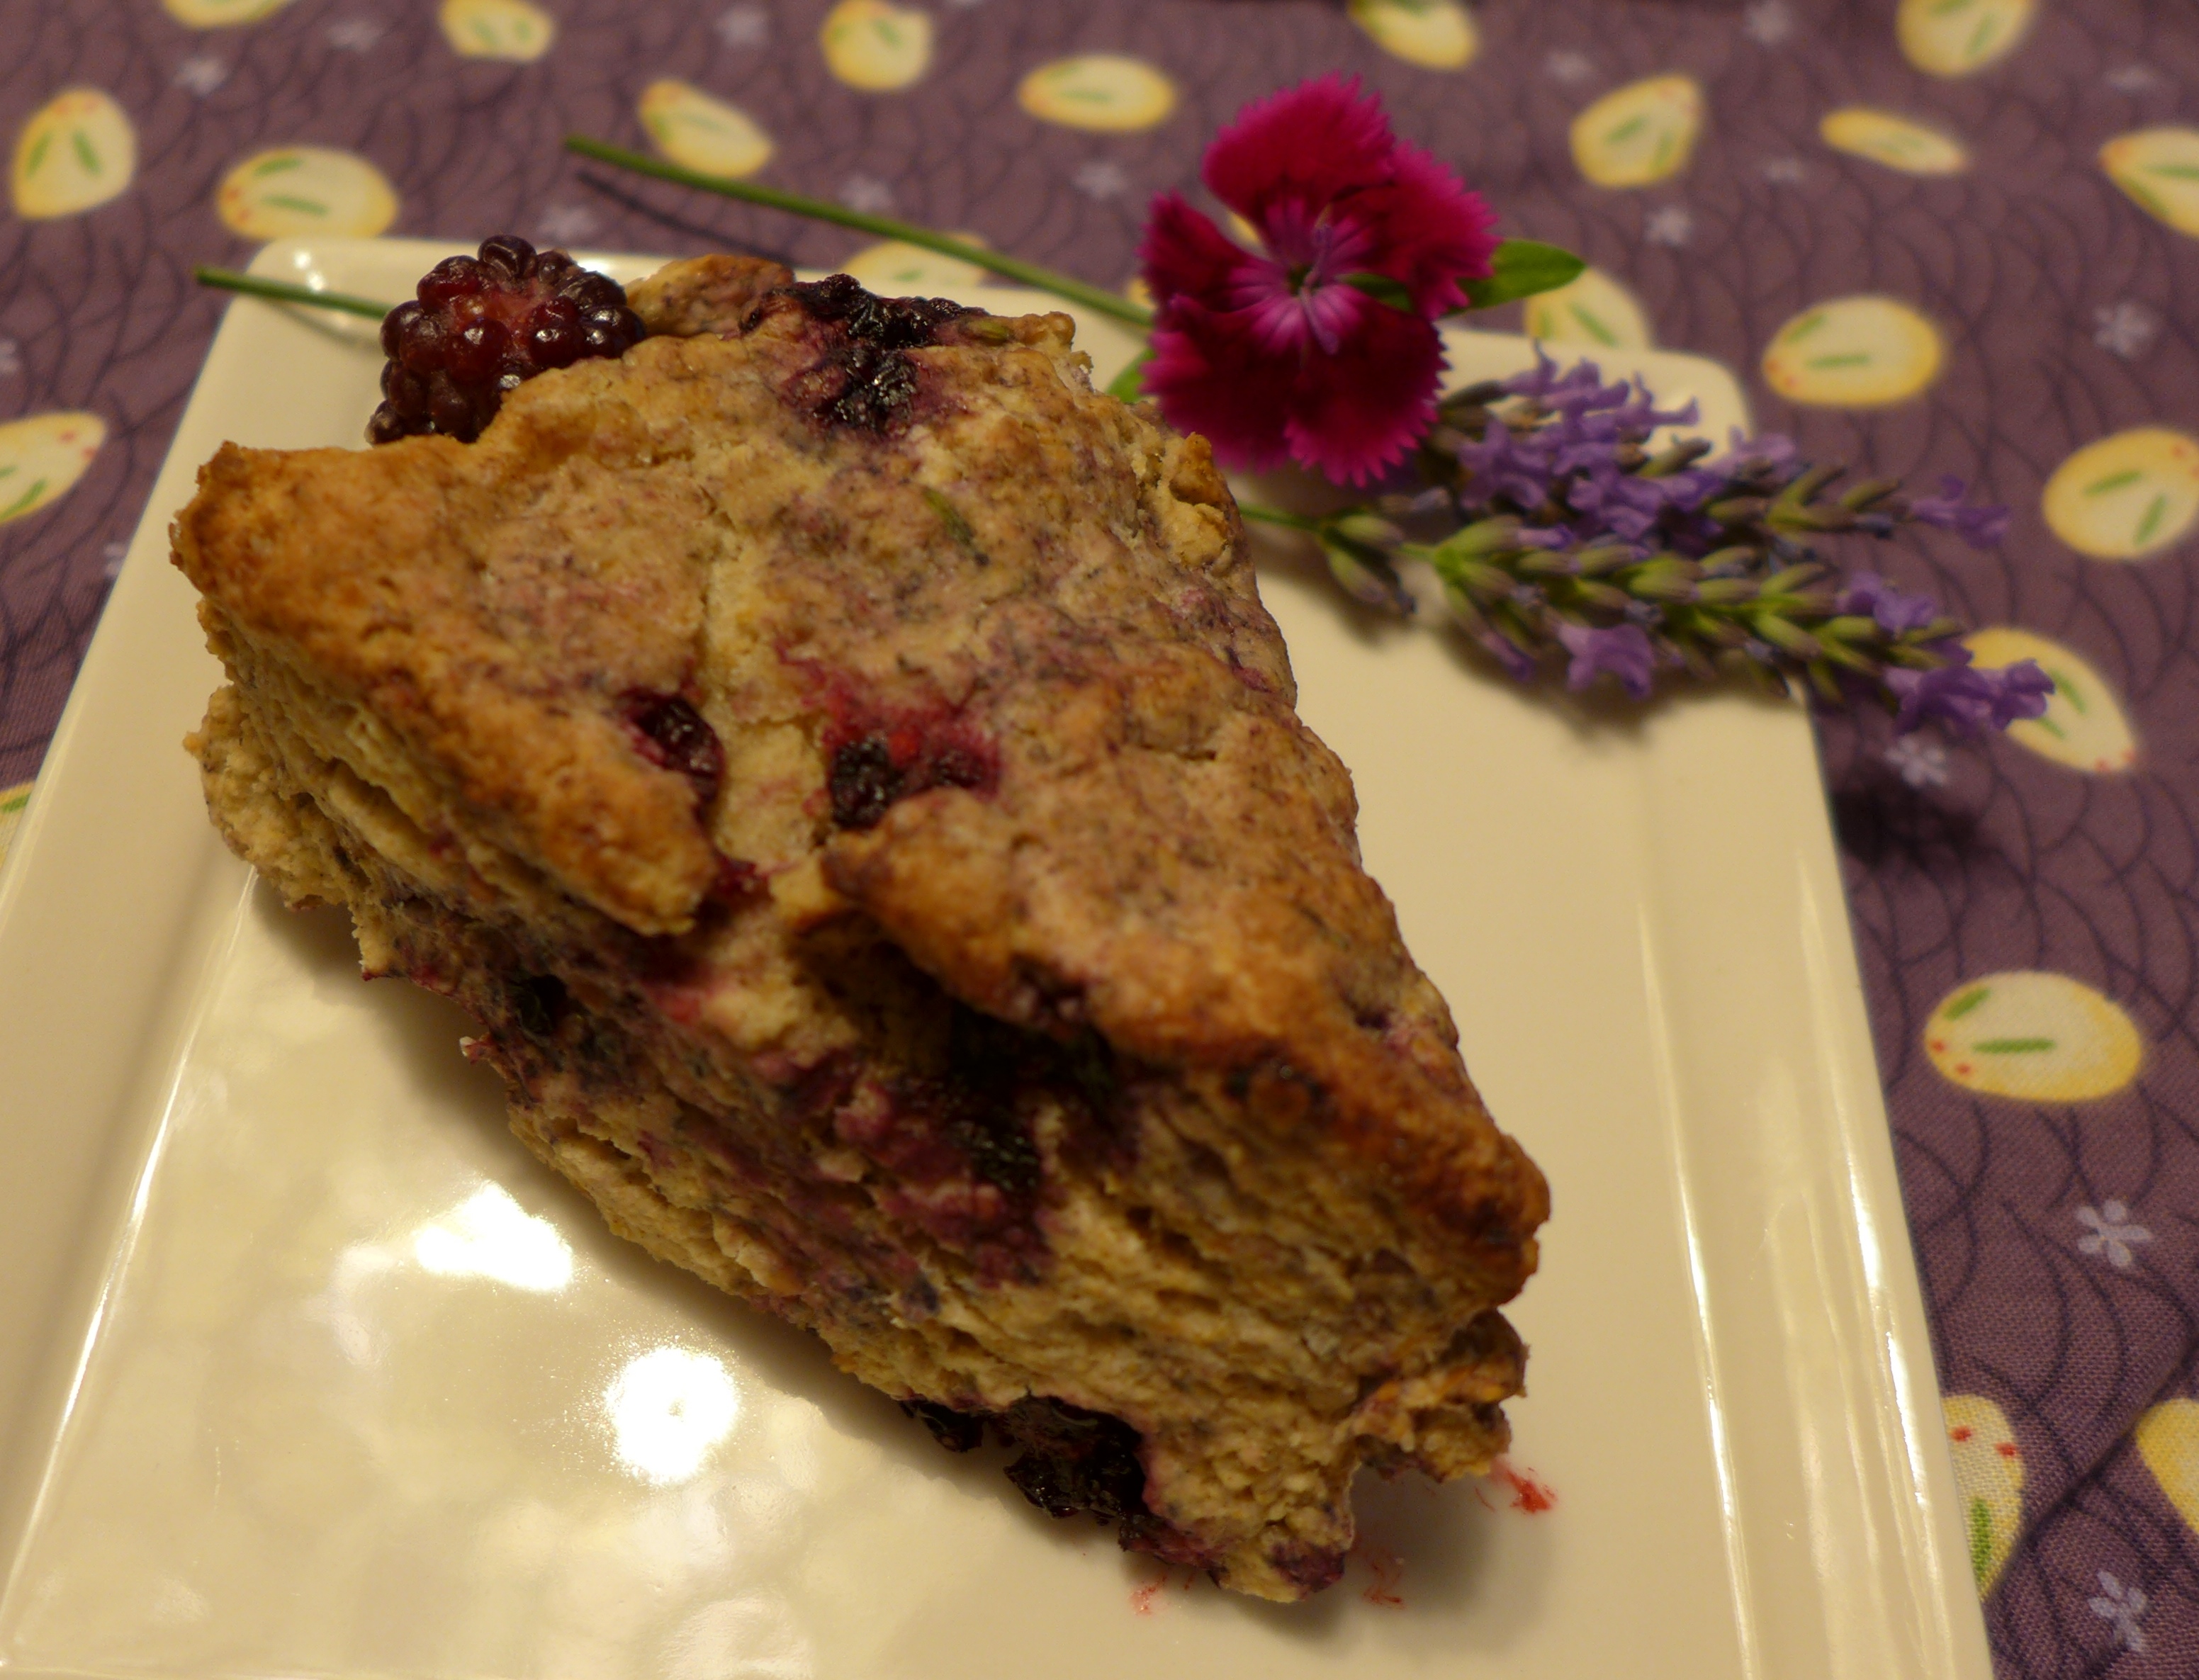
bagels


Featured

Dandelion Pesto

Each spring when the dandelions begin to show their yellow heads, I take my trowel in hand and gather as many as I can. This pesto is lovely on warm pasta, or as the base sauce for a pizza.

  •  4 cups, packed, dandelion greens
  • 1 cup, packed, mild greens, such as beet greens, spinach, or kale
  • 4 cloves garlic, sliced
  • ¼ cup toasted walnuts
  • 4 – 5 dried tomato halves
  • ½ cup grated parmesan or Romano cheese (if you are planning to freeze the pesto, add this when you thaw it.)
  • 1/3 cup olive oil
  • Salt and pepper, to taste


  • Blanch all of the greens: Bring a large pot of water to a boil, toss in the greens, cook for a couple of minutes, until the greens are bright green and wilted. Drain the greens through a colander and run cool water over them to stop the cooking. This process will mellow the flavor of the dandelions and retain a bright green color.
  • Place greens, garlic, walnuts, dried tomatoes, and cheese in the bowl of a food processor and process the mixture until it is well chopped.
  • While the processor is running, slowly drizzle the olive oil into the bowl. Add more oil if the pesto is too thick.
  • Add salt and pepper to taste.
  • Extra pesto can be frozen for several months.

Preparation time 30 minutes (not including the picking and rinsing of the dandelions plants)

Yield: about 2 cups

Copyright 2017, Jane Blaisdell, Original recipe.

0415171645

Featured

Blackberry Smoothie Bowl

This simple, delicious bowl of yum can be blended together in a couple of minutes.

  • 1/2 cup frozen blackberries
  • 1/2 banana, fresh or frozen
  • 1/2 ripe avocado
  • 1/2 cup plain, whole milk yogurt

Add all ingredients to a blender, and blend it until it is smooth.

Or, place the ingredients in a large, tall cup and blend with an immersion blender until smooth.

Transfer the smoothie to a bowl.

Add ons, such as shredded coconut, chia seeds, chopped nuts, banana slices, or berries can be arranged on the top of the smoothie.

Yield: 1 serving

Recipe by Jane Blaisdell

P1000542.JPG

Featured

Thai Inspired Pumpkin Soup

A cool, fall day is the perfect time to sit down to a steaming bowl of soup. This squash soup combines the flavors of fall with some classic Thai ingredients.

  • 2 Tablespoons olive oil
  • 2 shallots, thinly sliced
  • 1 teaspoon salt
  • 2 cloves garlic, minced
  • 1 Tablespoon fresh ginger, grated
  • 1 small fresh red chili pepper, chopped (reserve 1 Tablespoon for garnish)
  • 2 cups vegetable stock
  • 1 lb. sugar pumpkin or butternut squash, large diced (3/4”)
  • 1 stalk lemon grass, cut into 2 inch lengths
  • 1 cup coconut milk, plus 1/8 cup for garnish
  • 2 – 3 Tablespoons Lime juice

Heat a medium size saucepan over medium heat. Add the olive oil, allow it to heat, and then add the shallots and salt. Sauté until the shallots begin to soften.

Add the garlic, ginger and chili pepper, and cook for another minute.

Add the vegetable stock, squash and lemon grass and bring this to a boil.

Reduce heat to maintain a simmer, and let this cook for 30 minutes.

Remove the soup from the heat and remove the lemon grass.

Blend the soup until it is smooth.

Return the soup to the heat, allowing it to rewarm, and add the coconut milk.

Add the lime juice.

Taste and adjust salt and lime juice to taste.

Serve soup in bowls, drizzling each with some coconut milk and sprinkling with chili peppers.


Prep time: 1 hour 15 minutes

Yield: four, 8 ounce servings

Recipe by Jane Blaisdell, 2017.

P1000029

Featured

banana ice cream sandwiches

This is the post excerpt.

These delicious sandwiches have several steps: First, you need to make some chocolate cookies, then the banana ice cream. You will then be ready to assemble.

Chocolate Cookies

  • 1/2 cup sugar
  • 1/2 cup soft butter
  • 1/2 cup honey or brown rice syrup
  • 1/4 cup water
  • 3/4 teaspoon salt
  • 2 teaspoons baking powder
  • 1/2 cup cocoa powder
  • 2 cups whole wheat pastry flour
  1. In a medium bowl, cream the butter and sugar, then add the honey or brown rice syrup. Mix these together well. Mix in the water.
  2. In a separate bowl, mix together the salt, baking powder, cocoa powder and flour.
  3. Add the flour mixture to the sugar and butter mixture, and mix well.
  4. Cover the dough and refrigerate for 1 to 2 hours.
  5. Heat the oven to 375° F.
  6. On a lightly floured surface, roll the dough to a little less than 1/4″ thick. Cut with a cookie cutter – you choose the size.
  7. Bake for 8 to 10 minutes. Allow these to cool before using.

Banana Ice Cream

Freeze several ripe bananas, peels removed. You can slice them first so they will freeze quicker. The quantity depends on how much ice cream you need.

Place the frozen bananas into the bowl of a food processor. Process the bananas until they are completely blended. You may need to add some milk to help them to mix.

To use the ice cream for the sandwiches, spread it on a cookie sheet so it is about one inch thick. Place the cookie sheet in the freezer for about an hour, or until the ice cream is fairly firm.

Assembling the banana ice cream sandwiches

For each sandwich, spread a nut butter (peanut butter, almond butter, soy butter…) on one cookie. Remove the ice cream from the freezer and cut out a piece of it using the same cookie cutter used for the chocolate cookies. Place this piece of banana ice cream on top of the nut butter, then place another cookie on top of the ice cream. One ice cream sandwich made! Repeat this process for each sandwich.

Keep reforming the leftover ice cream until you have been able to cut it all into shapes for the sandwiches.

Keep the sandwiches in the freezer, in an airtight container.

bananachocolatepeanutbutter.JPG